Why Start Plants from Seed
There are many reasons to start plants from seed. Starting plants from seed will save money. A packet of 25-100 seeds is often the same or less than a single plant at a greenhouse or store. You also will have many more choices of plants and varieties to choose from. And, plants started at home aren’t given pesticides or synthetic fertilizers before they get to you. But, for the beginner, starting seeds can seem overwhelming. With our guide to seed-starting, it doesn’t have to be.
Get the Timing Right
Perhaps more important than any “thing” you give your seedlings, the biggest thing you can do for seed-starting success is start your seeds at the right time. I honestly still battle this. As soon as the holidays are over I want to start gardening. However starting seeds too early can cause several problems. You could end up with seedlings that are ready to go out in the garden before the garden or the weather is ready for them. So resist the temptation to start seeds earlier than the seed packets suggest. The only exception is possibly starting them a few weeks early if you plan to plant out early because you are using a cold frame or other frost protection.
The Must Haves of Seed Starting- “Soil”, Water & Light
Our guide to seed-starting begins at the beginning, besides the seeds themselves there are three things you absolutely need. Seed starting “soil” (something to plant your seeds in), water, and light.
Seed Starting “Soil”
The most obvious things you need to “soil” to start your seeds in. I put soil in parenthesis because you don’t actually want to use soil from your garden or even compost- whether you make your own or purchase it. I ignored this the first few years, mostly because I was trying to save money. However, I had several problems.
Soil or homemade compost will naturally have some degree of insects/larvae in them. That is probably something you don’t want to deal with, especially if you are starting seed in your home. They can also harbor plant diseases that will be more damaging to your vulnerable seedlings than they would be to established plants. Soil and or compost is also likely to react differently indoors than they would out in your garden. If nothing else, out in the garden there is more drainage and more air flow. Using soil or compost for seed starting can lead to problems with mold.
What to look for in Seed Starting “Soil”
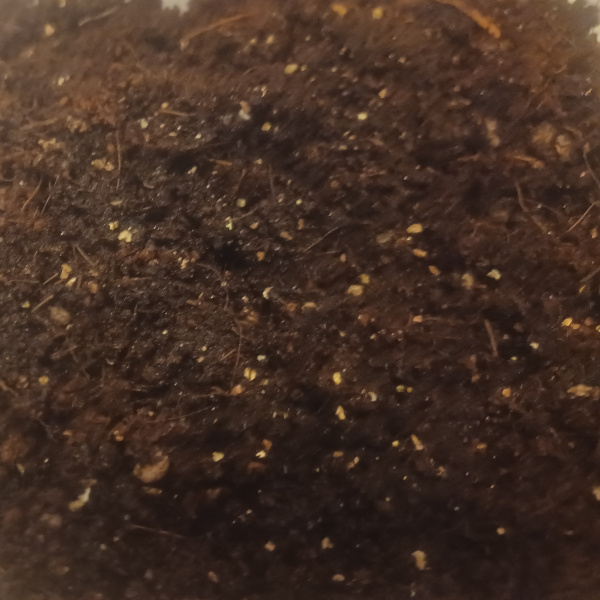
Now that we’ve covered what not to use to start your seeds, what should you use? There are seed starting mixes commercially available. If using one of these, the most important thing to look for is one that has a fine consistency. Avoid mixes that have large chunks of wood, or that are heavy and dense. You are probably best off looking for one that is organic as well. Excess synthetic fertilizers in a seeds starting mix will artificially prop up our seedlings, but they will likely suffer when we plant them out and they are no longer receiving these.
You can also make your own seed starting mix. I recommend a mix of:
- 8 parts Coco Coir
- 2 parts Perlite
- 1 part Vermiculite
- 1 part Earthworm Castings
If you would like to use this mix, but don’t want to obtain the ingredients or make this mix yourself, you can purchase it in 1-gallon, 3-gallon, or 5-gallon quantities. (Local Pickup only.)
Water
The second non-negotiable is water. This may seem obvious, but there are several nuances to watering seedlings.
Don’t Let Your Seedlings Dry Out
The easiest mistake to make with watering seedlings is to let them dry out. Especially just after germinating, allowing your seedlings to dry out will kill them. You want to water most seedlings as soon as you can see, or feel that the top of the soil has dried out. (Letting the top of the soil dry out will help prevent fungus gnats.)
Another way to judge if your seedlings need water is their weight. Noticing what your seedlings weigh just after watering them will help you know when most of that water is gone.
Don’t Drown Your Seedlings
The temptation might be to leave your seedlings in water to make sure they don’t dry out. This is a mistake, though. Plant roots need air as well as water, and sitting in water will deprive it of that. Essentially your seedlings will drown.
Water from below if possible
There are several advantages to watering from below. The biggest is that watering from below encourages root development. If you water seedlings from above, the roots don’t have to grow deep to reach for water. And if they don’t have to, they won’t. Wet leaves (or leaves with wet soil that splashes on them) are also more prone to disease. Watering from below will also discourage fungus gnats from making a home in your soil.
Use water without added chemicals
If you have municipal water, it is likely treated with chlorine and/or fluoride. If it is, your best option is to remove these before giving the water to your plants (or any other living thing for that matter). You can filter it, boil it for 15-20 minutes (then allow it to cool), or simply allow it to sit out for a day.
Light- Needed from the start?
This is a need that differs depending on the type of plant. Most seeds need darkness to germinate, but there are exceptions. Lettuce for example, needs light to germinate. Most seeds that need light will specifically say “press into surface”, “barely cover”, or “requires light for germination” on the seed packet. Most other seeds should be planted 1.5-2 times the seed’s width deep.
Regardless of whether the seed needs light or darkness for germination, they all need light once they break the soil. So place your seedlings under lights as soon as you see the first one break the soil. In most places, the amount and strength of sunlight will not be sufficient to help your seedling thrive. So some sort of lights are recommended.
While the type of light is less important- you can use plant lights, LED/fluorescent shop lights, or even incandescent lights. More important is the proximity of your lights to the plants. You want your lights as close as possible to your plants without letting them literally burn your plants. This will differ depending on the type of lights you are using. It is helpful to have lights that are adjustable, so you can adjust the height as your seedling grow. This doesn’t have to be high-tech. I use lightweight shop lights suspended from shelves with twine.
Opinions about how many hours per day you should use plant lights differ, but the general consensus is 12-16 hours per day. I have seen recommendations that as you get ready to harden off your plants, you reduce the hours of light to be closer to the number of daylight hours you will have when you transplant them outside. The thought is this will help reduce transplant shock as the plants get used to being outside.
Warmth is Often Nice to Have
Now that we’ve covered the non-negotiables in our guide to seed-starting, we get to the things that are helpful. Knowing the optimal temperature for your seeds is also important. Most seeds can benefit from added warmth. Heat mats are available and relatively inexpensive. But if you can’t or don’t want to use them, you can use the top of the refrigerator, or a shelf near a radiator. (Not ON the radiator.) As soon as you see the first seedlings break the soil remove them from the heat mats and put them under lights.
You can find the heat mats I use here.
Humidity & Airflow- Improve your seed-starting success
The general rule of thumb is to use a humidity dome until half of your seedlings have germinated. This is simply a cover over your seedling tray that helps keep moisture in. This is particularly important if you are using added heat for your seedlings. This can be as simple as a clear plastic bag or cling wrap.
However, after that point, you want to remove the dome. It is even better to add a fan for at least several hours a day to increase airflow. This does several good things for your seedlings. It will help keep the top layer of soil from staying too wet. It also helps the plants develop stronger stems, and be less likely to experience transplant shock when exposed to wind after being transplanted.
Feed your seedlings if you aren’t planting out or potting up quickly
You may think that seed-starting “soils” would have extra nutrition for your baby seedlings, but quite the opposite. Seeds generally have enough nutrition to feed the seedling until the second set of leaves develop. For that reason, seed-starting “soil” typically contains little or no nutrition. For that reason, if you are starting seedlings that are going to be indoors for more than a few weeks, you need to either fertilize your seedlings or pot them up into a bigger pot with potting soil instead of seed starting “soil”. If you are going to fertilize seedlings in their existing containers. It is recommended to add the fertilizer to the water when you water them and to dilute it to between 1/4 and 1/2 the ratio recommended on the fertilizer.
Special Circumstances- Stratification & Scarification
This section of the guide to seed starting only applies to certain seeds. There are some plants that have special requirements. Some need cold stratification. This is simply mimicking a winter. While a few plants have more specific stratification needs, most seeds can simply be put in a damp paper towel and be placed in the refrigerator for 1 to 4 weeks before planting.
Scarification may sound complicated, but it isn’t. Some seeds have a harder outer shell and scarification is weakening that outer shell to improve germination. You can use a nail file to rough up that shell, or you can soak the seeds for a few hours to a few days prior to planting. Refer to your seed packets to see if scarification is recommended.
Don’t let the optimal stop you from seed-starting
It is likely that you may not be able to follow every suggestion above. Don’t let that stop you from starting seeds! The first year I started seeds I followed hardly any of the suggestions above. I had nice-looking seedlings… at least until my cat decided to use my seedling trays as a little box. (Bonus tip- protect your seedlings from pets!). Each year I have implemented more of the suggestions, and yes my success has grown, but start where you are with what you have! I hope this guide to seed starting helps you feel confident to start your plants from seed.

Seed Starting Mix
Our premium seed-starting mix is a fine, airy organic mix perfect for starting seeds


Leave a Reply